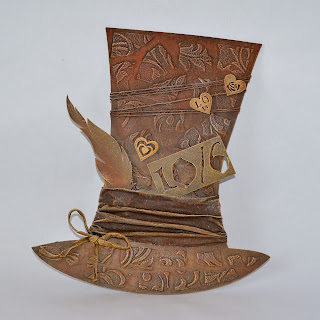
Hi it's Kore! Take a look a this adorable little Top Hat project. This cute kit size makes a great project for an afternoon of crafting and all you need to add is some Powertex Universal Medium and a couple of pigment colours. As always you can include fabric, lace and embellishments from your own stash.
Ingredients
Top Hat project kit
Apron, gloves, Paper/plastic plate, flat brush, paper towel.
Optional
Length of string to wrap around hat
Small piece of cotton/muslin to wrap front of hatband
Piece of t-shirt yarn/strip of fabric to make a bow
(Remember natural fabrics and fibers work best with Powertex)
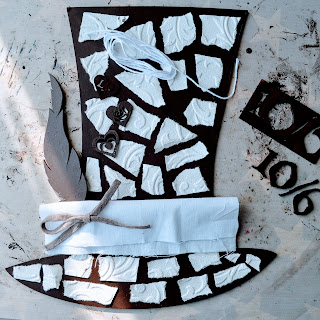
You can see the decorative pieces I've chosen below. The MDF pieces and the wallpaper from the pack plus a length of string, tshirt yarn (enough for a bow) and a piece of cotton muslin, enough to pleat and wrap around the front.
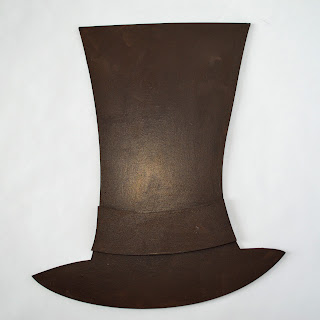
Pour a few tablespoons of Bronze Powertex into your plate and paint the base pieces. You have about an hour of working time. This seals the MDF and is used to glue the base pieces together. Dry them on a plastic surface or craft mat.
I had a play with laying out my pieces and decided to tear up the wall paper so I could get the texture all over. When you know which pieces you like, paint them with the Powertex.
Now pour out a few more tablespoons of Powertex and use your brush to paint and stick down the wallpaper pieces and paint over them. You may want to wear your gloves for this part!
To add the fabric hatband use your fingers to apply Powertex to half the fabric, not too wet, and then massage it through the whole piece. Ensure the whole piece is covered but don't saturate it or it will take a long time to dry. The fabric should be sticky to hold. When it's ready, you can wrap it around the front of the hat, creating pleats and wrinkles as you like. The Powertex will stick the fabric to the base and when dry will hold it's shape.
Use the same technique with the string. Tuck the feather into the hat band while the fabric is wet.
Use Powertex to adhere any other embellishments such as the small hearts, the tag or anything else you fancy! Just remember that Powertex doesn't stick well to plastic. If you prefer you can colour your embellishments before sticking them to your finished project.
Leave to dry. Depending on room temperature this may take 1-4 hours to be touch dry. My art table on a sunny day will dry this nicely in half an hour!
There's lots of texture on here so now we need to bring that to life with some colour. We use Powercolor pigments for our colours. They come in powder form so can be mixed with many mediums but here we are going to use Easy Varnish to create a paint that is also weatherproof!
I chose Red Ochre and Yellow Ochre as these warm pigments really complement each other and look fantastic against the Bronze Powertex.
Use a flat 3/4 inch brush and put a small blob of varnish on a plastic plate or craft mat. Pull a tiny amount to the side with your brush and then dip the tip of your brush into the powder pigment. Tap off any excess and then mix this with your varnish. The varnish dries quickly so mix small amounts.
For the dry brushing technique in this project your paint mixture should be quite dry. Wipe excess paint from your brush on a paper towel before you touch your project. Keep your brush flat and brush your project in the same direction each time. Your aim is to highlight the textures you have created and leave the Bronze coming through.
I used more of the red at the top of the hat and more the yellow at the bottom. Also if you're not sure about the colour, you can brush over it again until you're happy. The Yellow Ochre was great for highlights against the Red Ochre background.
I made, dried and dry brushed the bow in Yellow Ochre before I attached it with Bronze Powertex.
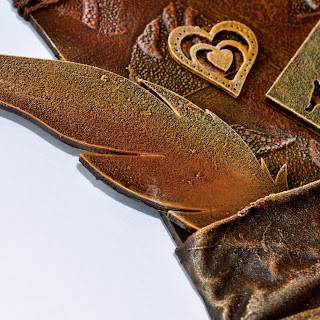
I brushed pigments straight onto the feather piece.
The Yellow Ochre hearts really stand out against the dark background but I used white for highlights.
Products can feel overwhelming when they do so much but these techniques are simple and fun for any age. The project packs make it easy to get started and you can add treasures or scraps from your stash to make it really personal.
I really hope you've enjoyed this project. Don't forget to check out the YouTube channel for instructional videos and projects or The Powertex Studio on Facebook for inspiration or to chat to other Powertex Addicts! You can also contact Powertex UK to find a Certified tutor or workshop near you.
Ok, now it's your turn, have a go and let your art out!
Kore x


No comments:
Post a Comment