Hi it's Kore here again from a beautifully warm and sunny Brighton. I love to live by the sea and the beach is my favourite place here under summer sun or on wild and stormy days. I wonder if the sun will still be shining when you read this!
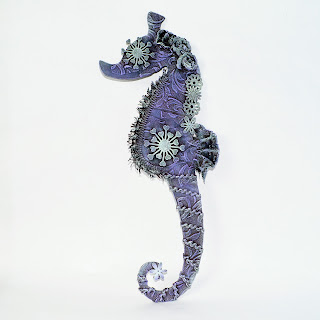
I had the pleasure of making this lovely seahorse project this month. It uses two simple Powertex techniques to make amazing textures and stunning colour effects. Take your Seahorse Project pack and just add some Bronze Powertex Medium and the Powercolor pigment tray and away you go!
Ingredients
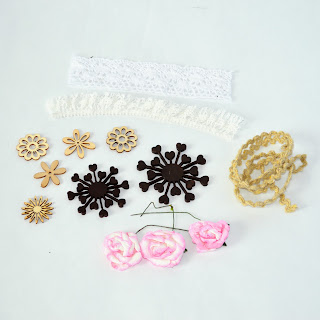
Seahorse kit
Powercolor in Moss green, Lilac from the Powercolor pigment tray
Apron, gloves, paper/plastic plate, flat paintbrush, kitchen towel
Optional
Lace or fabric pieces
Ric rac wavy yarn
Remember natural fabrics work best with Powertex.
You can add embellishments from your stash too!
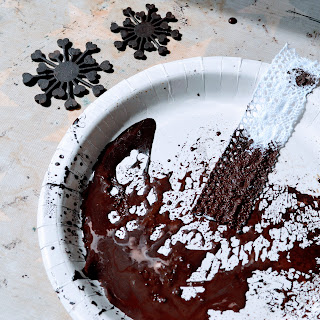
Start by preparing your MDF pieces with Bronze Powertex. Shake your Powertex gently before opening. Pour 2 or 3 tablespoons onto a paper or plastic plate. Paint the pieces and use the small rectangle to glue your Seahorse template together. The looped piece can be folded and attached to the back as a hanger.
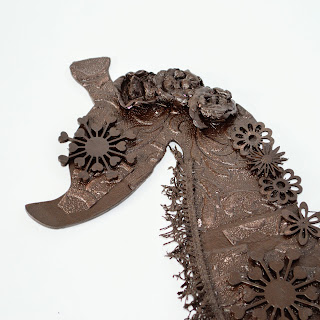
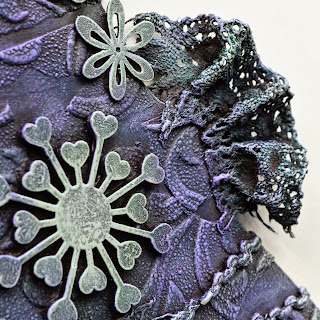
Next start to add your textures onto the template. Tear up or cut the wallpaper into pieces and use the Powertex to stick it down. Then add the embellishments. Use a brush to gently paint the flowers, be careful not to make them too wet. Use a small blob of Powertex to stick pieces into place.
The lace can be sculpted with the Powertex. Apply Powertex to half the piece and then massage through the fabric. You can add extra Powertex but the fabric should be sticky and not too wet.
Use the lace and fabric pieces to decorate your template. Create a fin with pleated lace and a blob or two of Powertex to stick down. Apply Powertex and then wrap the ric rac around the tail in a spiral. Add all your MDF shapes. Ensure everything is coated with Powertex.
The working time of Powertex is about an hour so there's time to moves things around too. When you're ready, leave your Seahorse until touch dry for 1-4 hours.
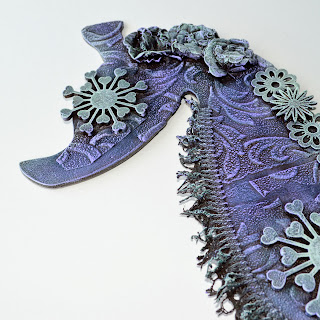
When touch dry you can start to add colour and you will see all those textures come alive! I chose 3 colours from the pigment tray, Lilac, Moss Green and White.
Mix your powder pigments with Easy Varnish for a weatherproof paint. For this project we use a dry brush technique to highlight the texture. Use your flat brush to put a tiny blob of Easy Varnish on a plastic plate or craft mat. Dip the brush into the powder pigment and tap off any excess. Mix this well with your varnish. Add pigment until you have a dry-ish paint. Remember to mix small amounts at a time because it dries very quickly.
Wipe off excess paint onto the paper towel and keeping your brush flat, brush over your textures. I used lilac over the whole template and then highlighted with moss green on the embellishments. You can keep brushing over with colour until you're happy with the results.
The white pigment adds brilliant highlights.
More embellishments can be added anytime. The project will dry quickly to touch and will harden in a few days. If you wait for the project to cure fully for 3 weeks it can even go outside as it will be weatherproof!
There she is! Sophie? Sally? Sadie Seahorse?
Don't forget to check out the YouTube channel for instructional videos and projects or The Powertex Studio on Facebook for inspiration or to chat to other Powertex Addicts! You can also contact Powertex UK to find a Certified tutor or workshop near you.
Ok, now it's your turn, have a go and let your art out!
Kore x





No comments:
Post a Comment